Once you’ve created a user account with KandaSearch, getting your search engine up and running is possible with just a couple of clicks. In today’s post, we’ll show you how to go from 0 to searching in 5 easy steps.
- Step 1: Create an Project
- Step 2: Project Setup
- Step 3: Create an Instance
- Step 4: Create a Collection
- Step 5: Index Documents
- BONUS: Add Project Members
Step 1: Create a Project
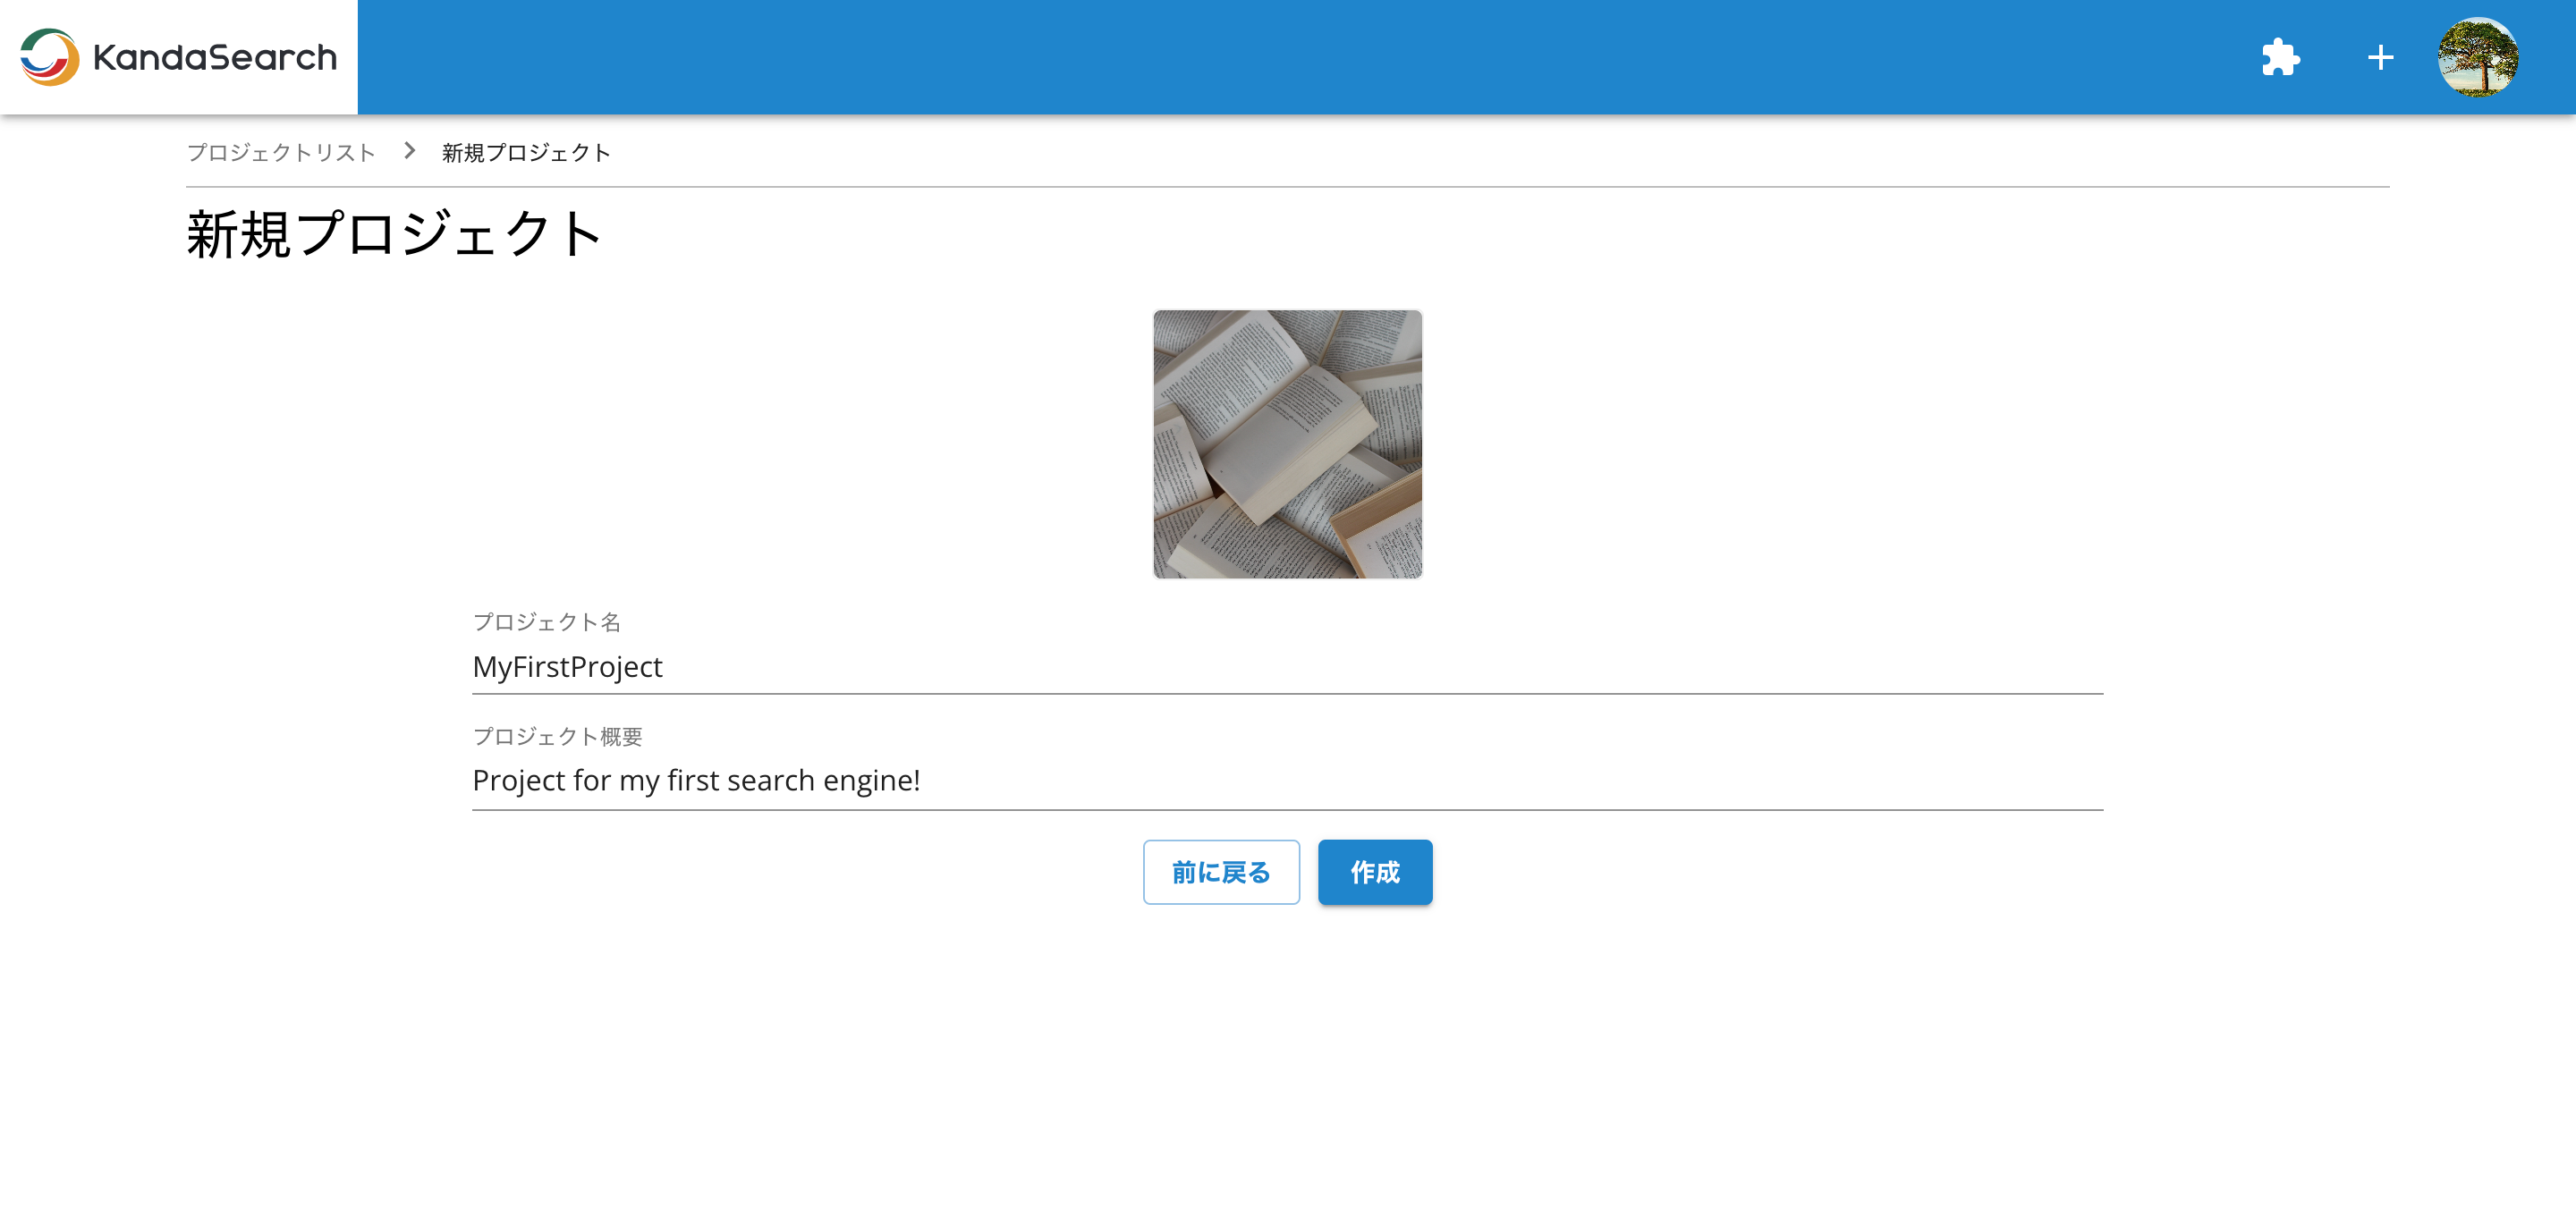
Once you’ve logged in, you can create a new project by clicking the “New Project” button. You can give your project a name, short description, and give it an image to make it more easily recognizable. Later on you can add other users to your project to work together to build and manage your search engine.
Step 2: Project Setup (Optional)
Once you’ve created your project, the next thing you want to do is create an instance. Not all instances are created equal! Based on what you want to do, you have 2 options to set up your first instance. If you want to create a 7-day free trial instance, you can skip this step and move on to step 3. If you are purchasing an instance, then you’ll need to setup 3 things:
- Project Manager
- Billing Manager
- Payment Method
Setup a Project Manager
The project manager is the person who is responsible for the project itself. If you’re reading this and are thinking about creating a project, that person is probably you. If your organization or team is creating a project, it's best to ask who this person should be.
Once you’ve actually chosen a project manager, setting them in the system is easy. On the project sidebar, simply click the “Settings” tab.
Once you’re on the project settings page, scroll down to the Section labeled “Project Manager”, click the “Add a Project Manager” button. Keep in mind that the project manager does not need to be a user in the system, but we recommend they have an account in case anyone reaches out to them.
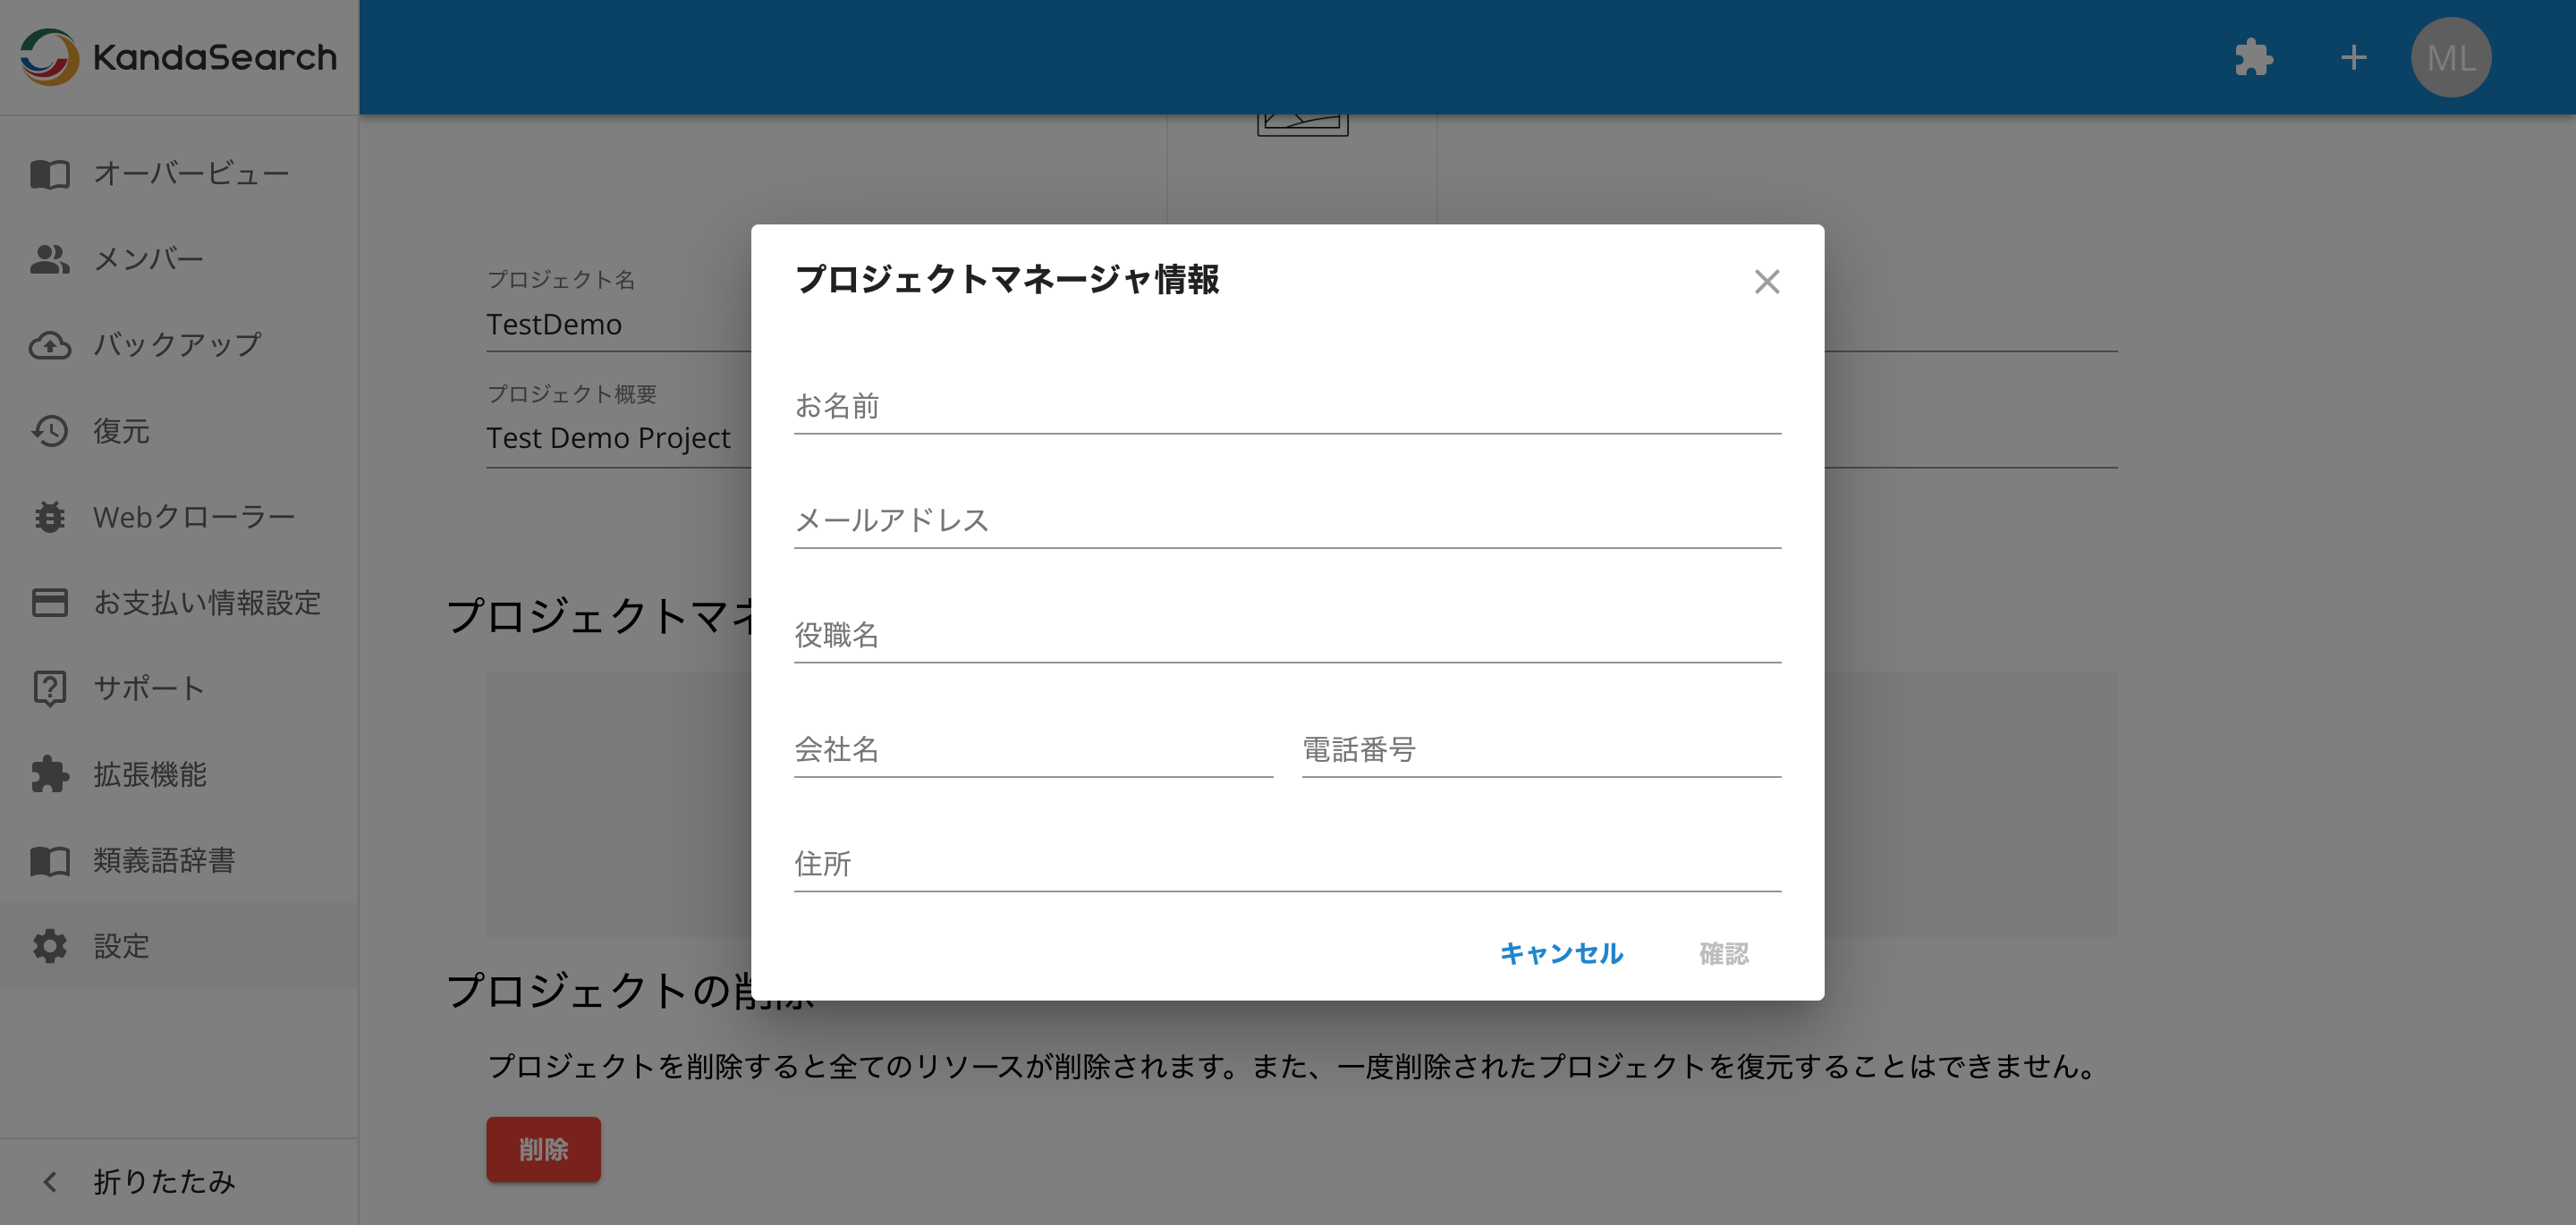
Once you’ve filled in the project manager’s information, click confirm, and it's done!
Setup Billing Information
The billing information is just a contact for us to reach out to for billing matters. Whether you’re using a credit card for smaller instances, or paying by invoice for larger ones, this will be the point person in your organization for any matters regarding billing and payment. To fill out this information, simply click the “Billing Information” tab on the project sidebar.
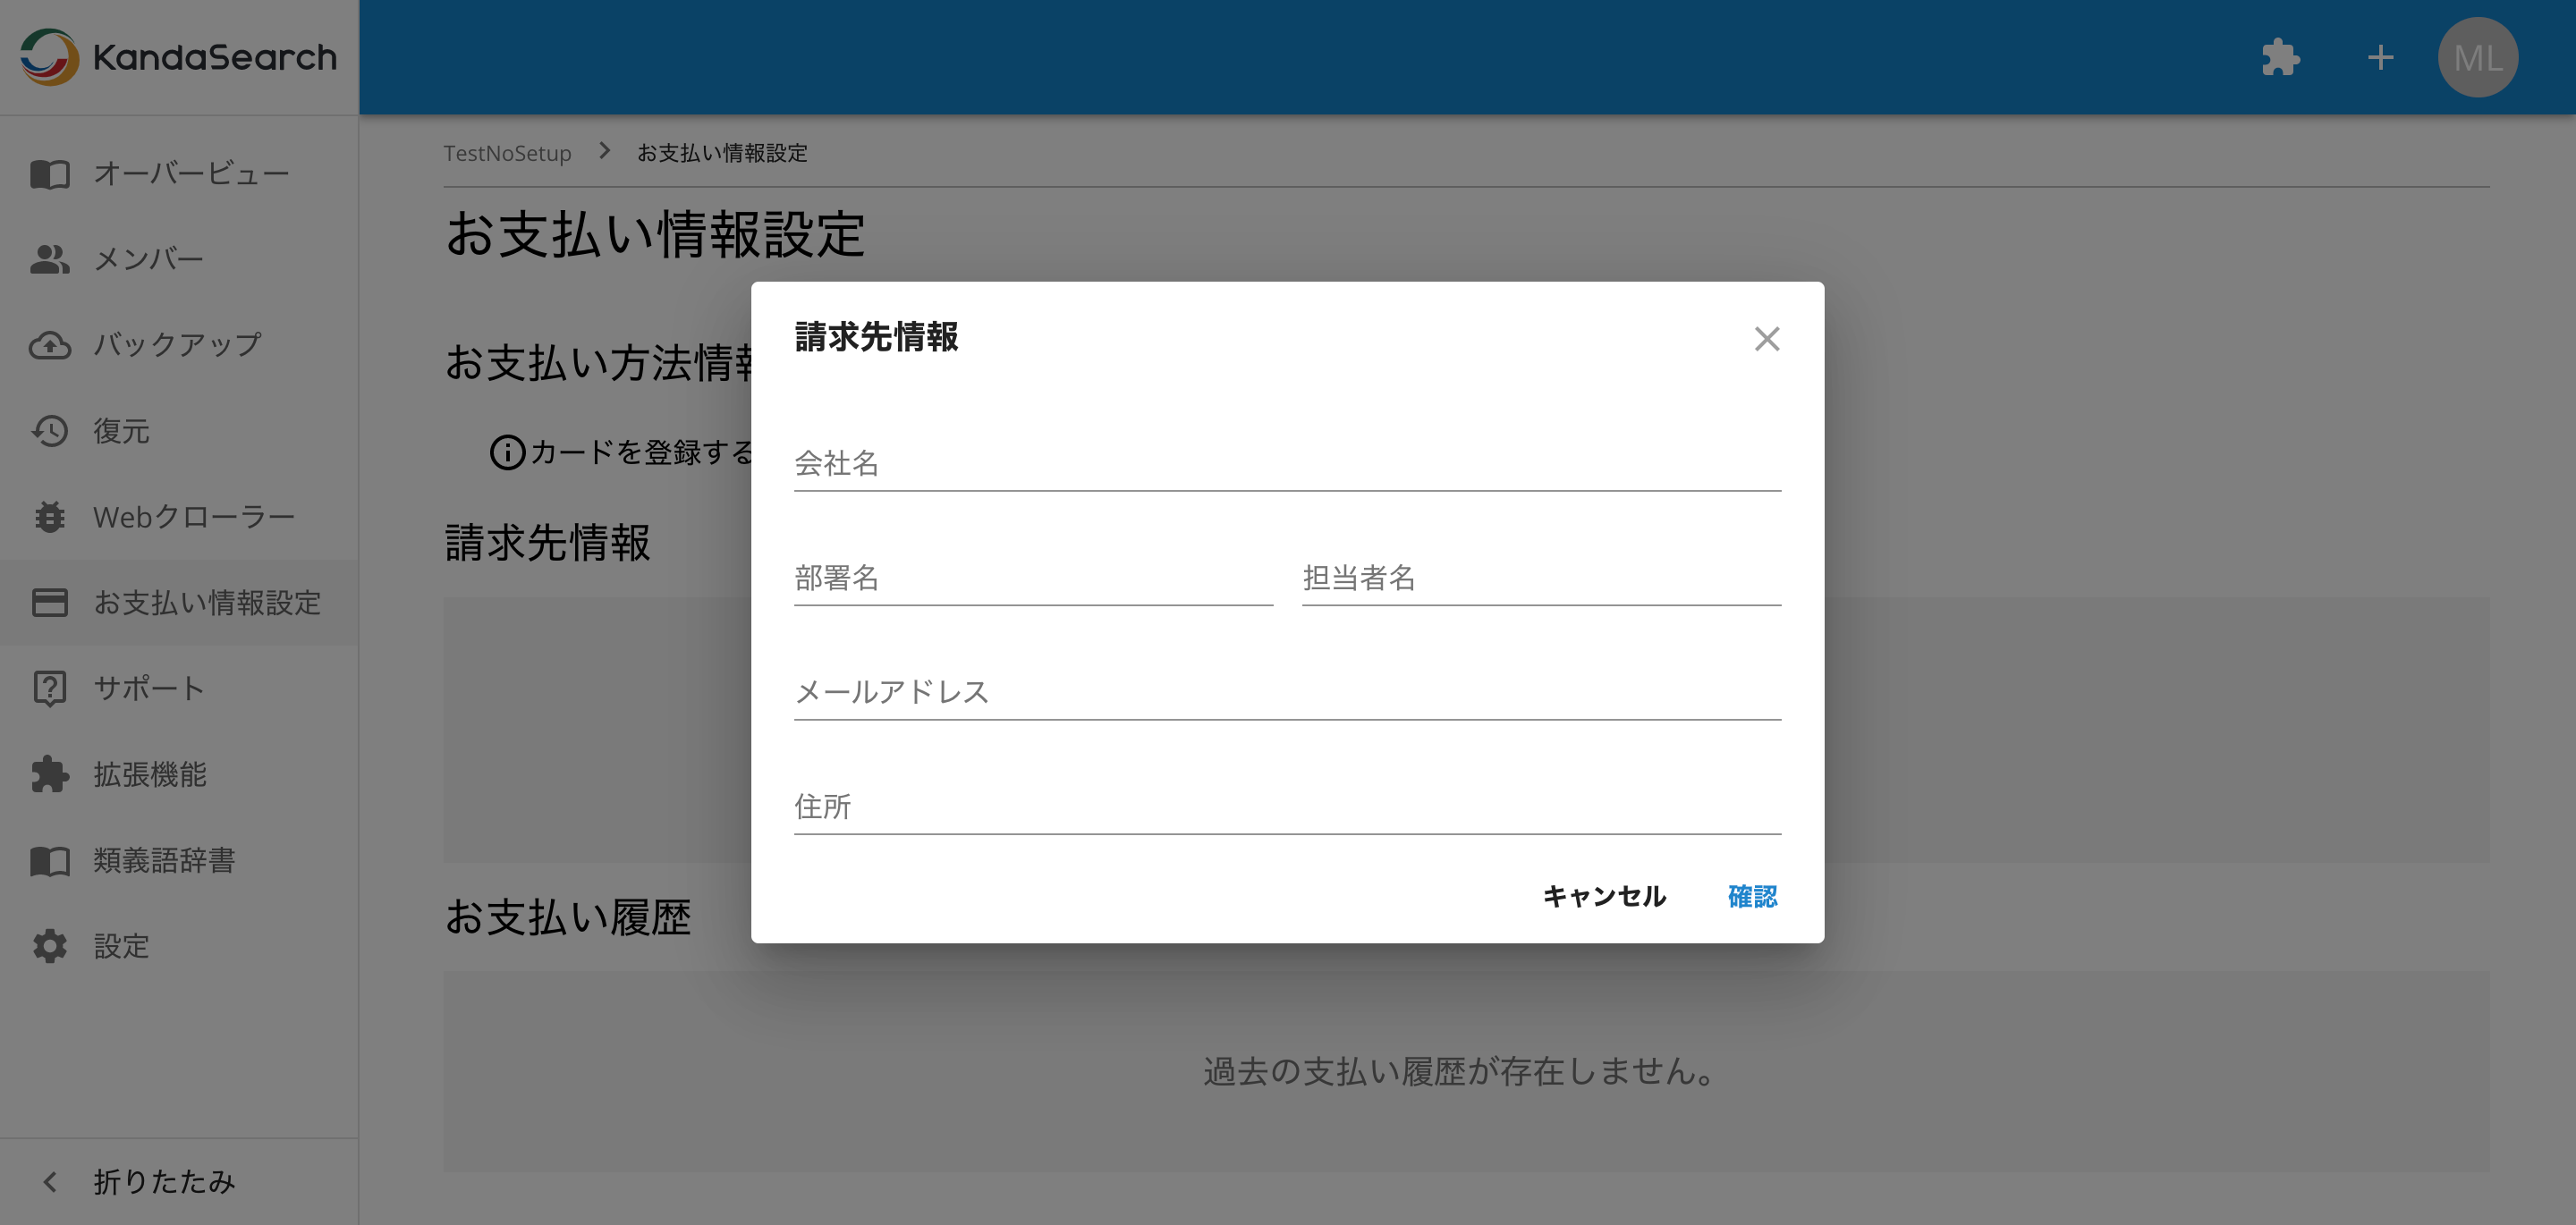
Once you’ve navigated to the Billing Information Page, scroll down to the “Billing Information” section, click the “Add Billing Information” button, and fill out the information in the dialog box. Once you’ve clicked confirm, your Billing Information is set! Keep in mind you may change this information at any time by navigating back to this page.
Adding a Payment Method
The last step to setting up your project is to add a payment method. For most instances, all you need to do is add a credit card. In cases where your setup is a little more complicated or for very large instances, we have the option to pay by invoice. If you feel you need to pay by invoice, please navigate to our website’s homepage, scroll down to the ‘Contact Us’ section and fill out an inquiry, and we’ll get back to you as soon as possible.
If you want to use a credit card for payment, you can do this from the Billing Information Page where you set up your Billing Information. At the top of the page, click on the “Add a Credit Card” button. Keep in mind that you will not see this button if you do not have any billing information, so you need to make sure you have set up your billing information first.
Once you have saved your credit card, now your project setup is complete! It's time to create your instance!
Step 3: Create an Instance
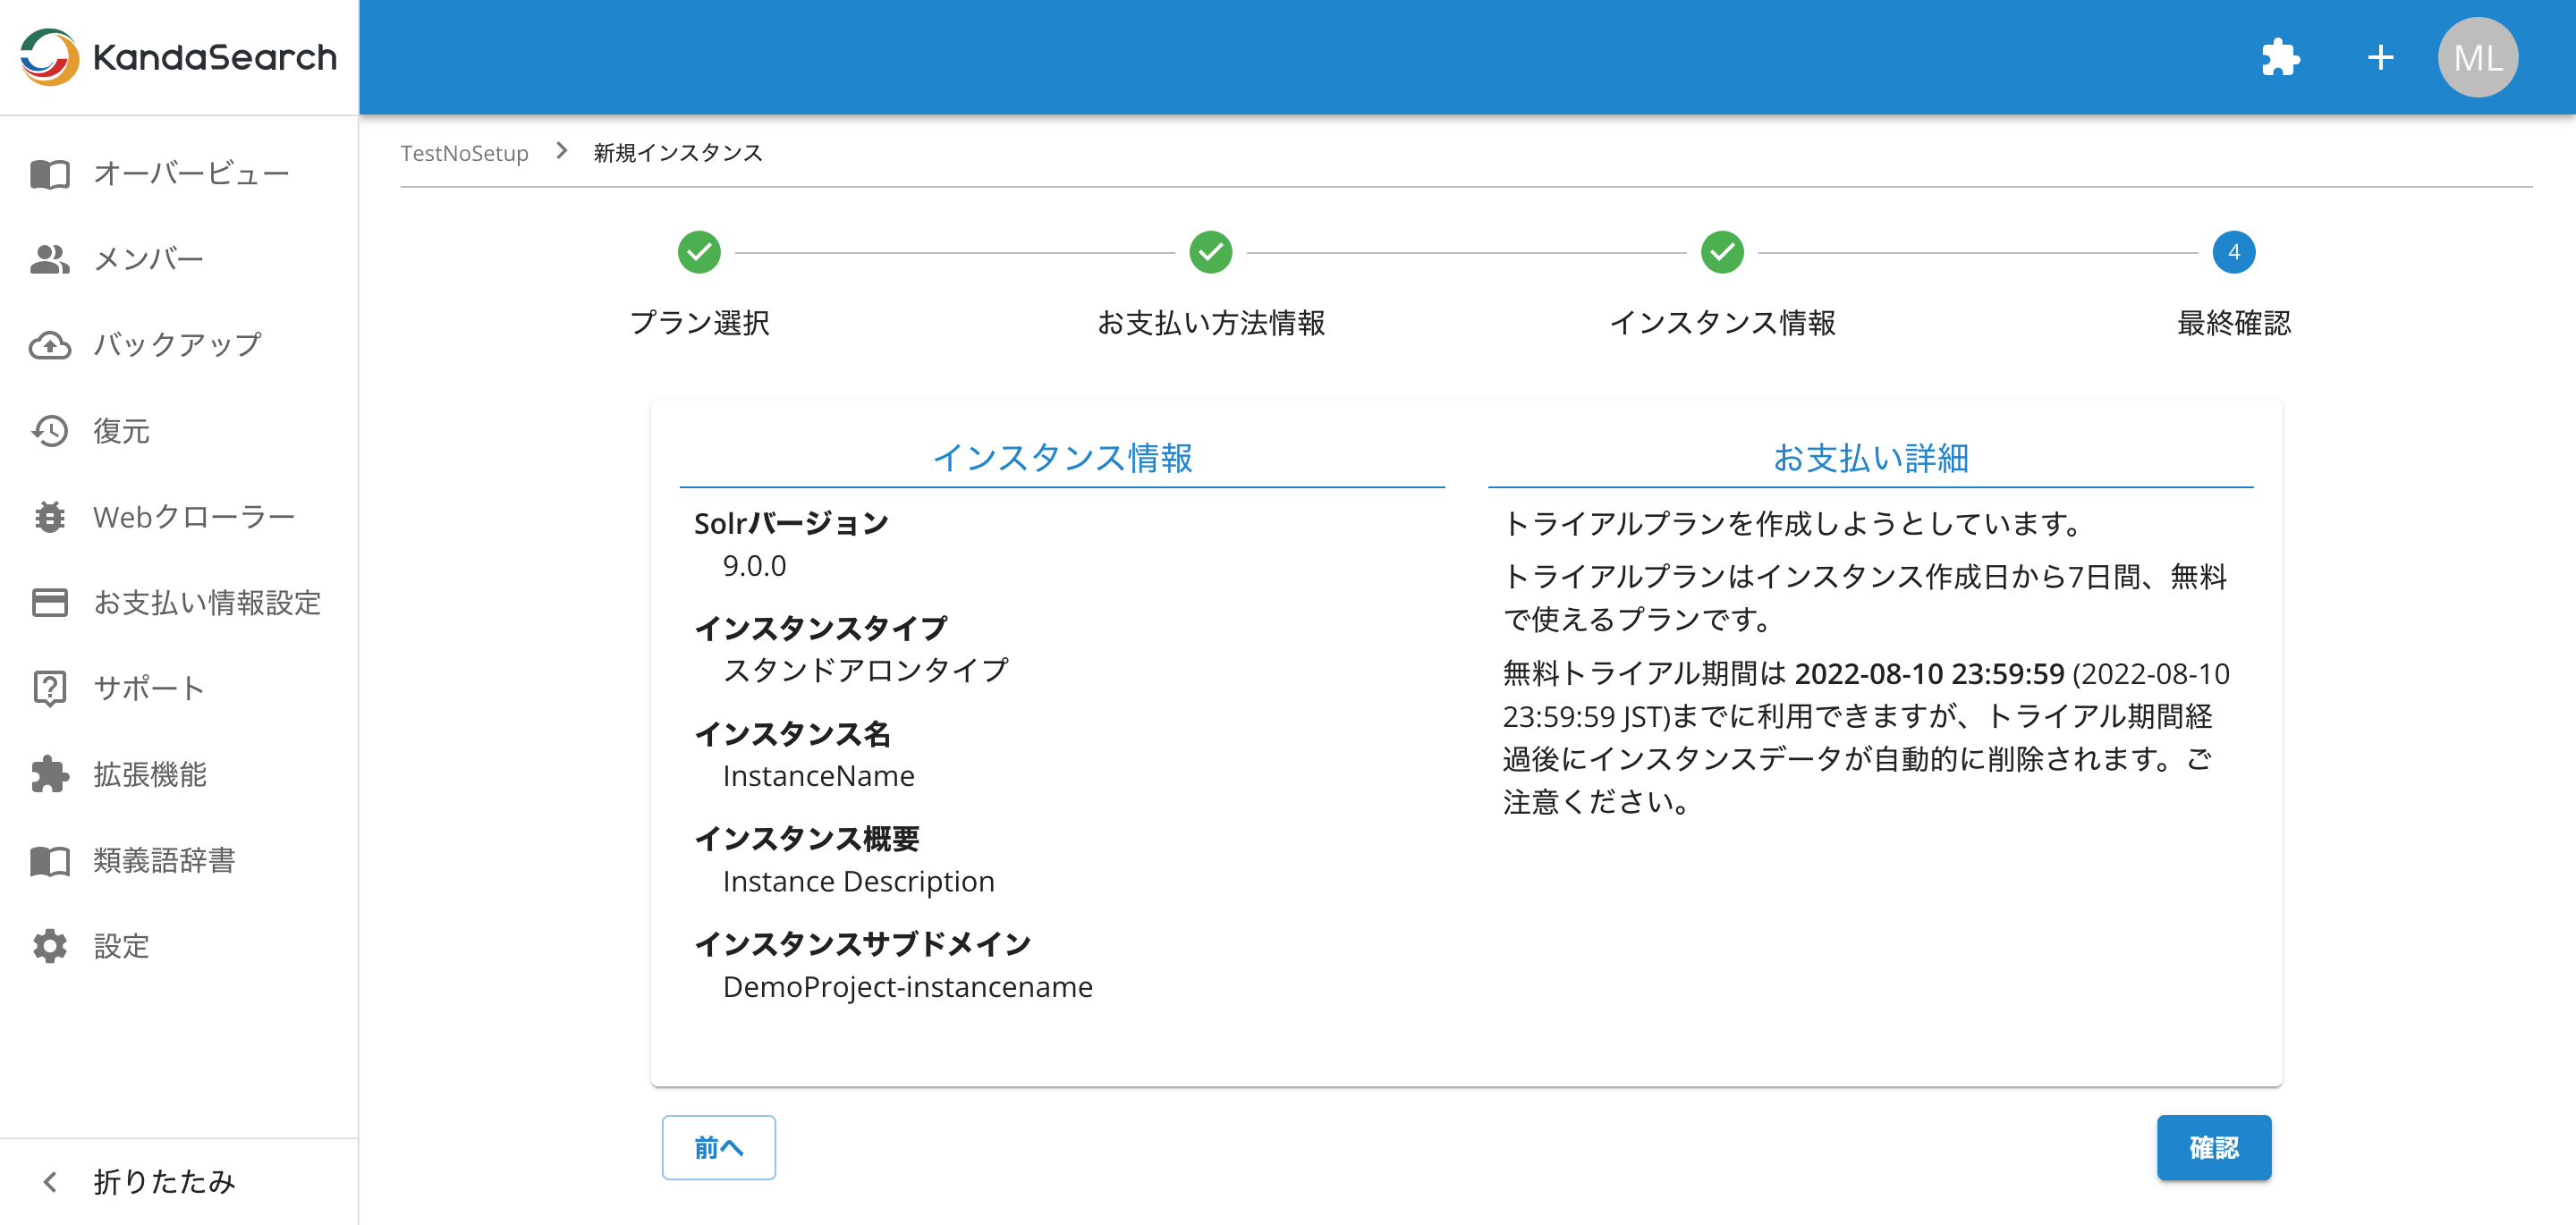
KandaSearch has really simplified the instance creation process to help you get your search set up faster and easier. To set up your instance, go to your “Project Overview” page and click the “Create Instance” button. From there, we’ll guide you through the process of creating an instance, helping you set up things like the sub-domain for your instance, security, recommended instance types, and even your storage size.
Once you filled out all of your instance parameters, make sure to carefully check the final confirmation page, click the confirm button, and voila! Your instance is created!
Step 4: Creating a Collection
Now that we have an instance, we need to create an index for your documents. To do that we’ll create a collection. If you have just created your instance, then it may take a few minutes for the system to finish setting everything up on the backend. You can check when your instance creation has finished by checking the list of instances on the Project Overview page. If there is a solid green dot next to your instance name, this indicates that your instance is running and setup is complete.
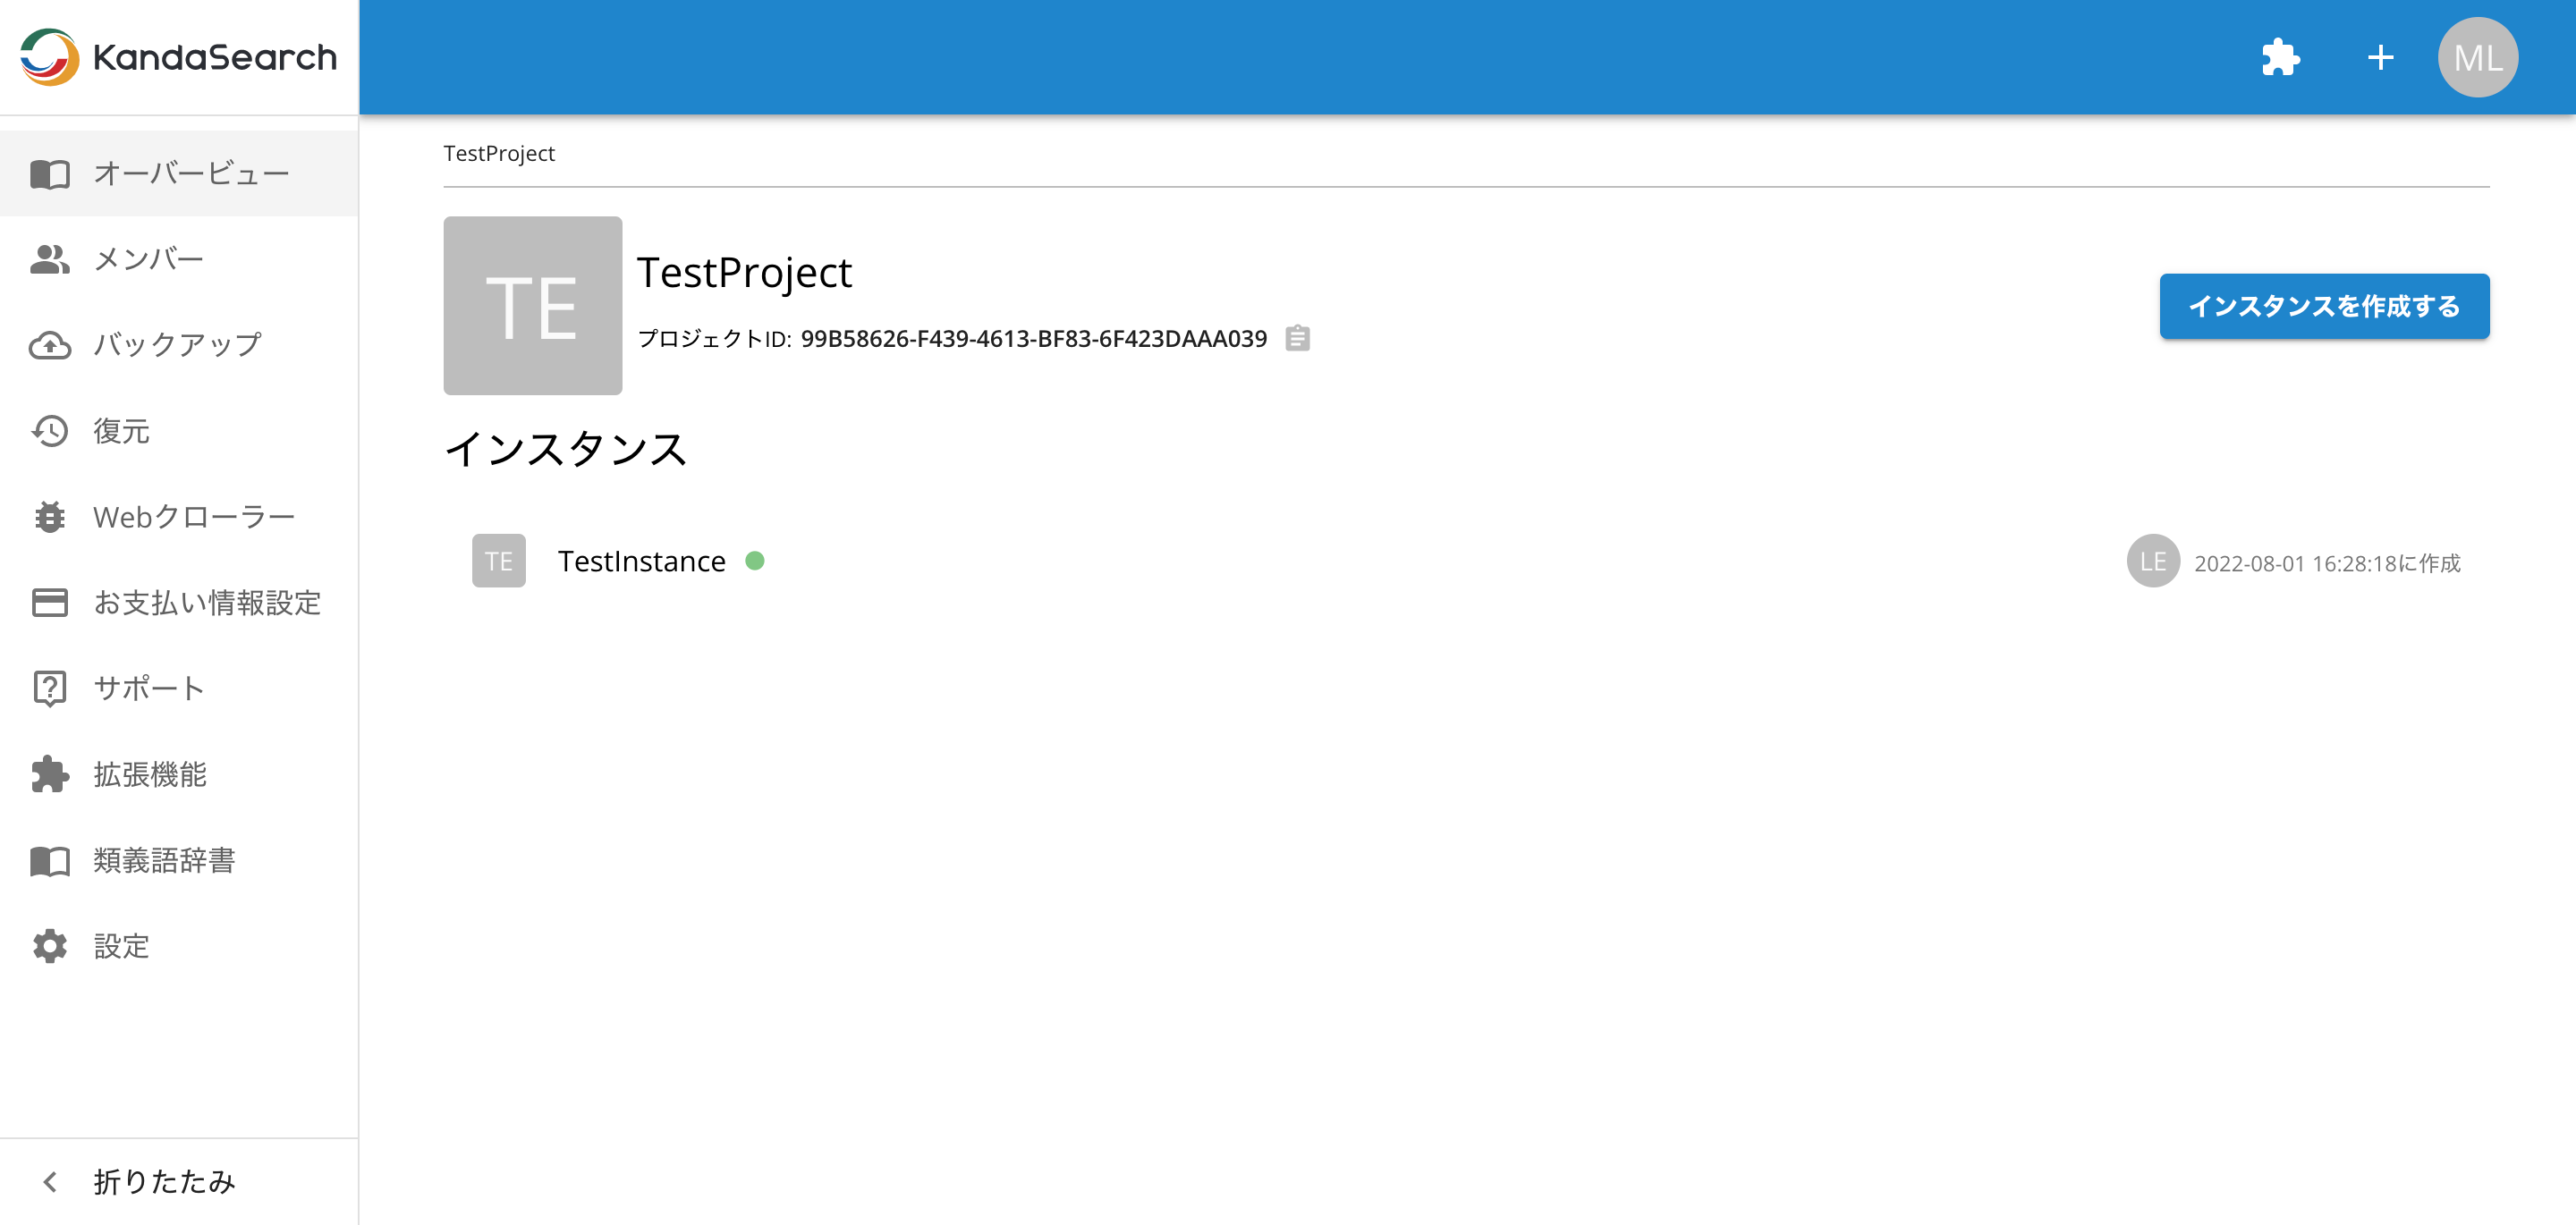
To create your collection, click your instance from the instance list, and then click the “Collections” tab on the Instance sidebar.
Click the “Add A Collection” button and make sure to give the collection a name. If by chance you already have a collection file with a configured schema, you can click the import tab at the top of the dialog box and import the collection from a zip file. Otherwise you can click “Save” to create the collection now and then update the schema later under the “Config” tab.

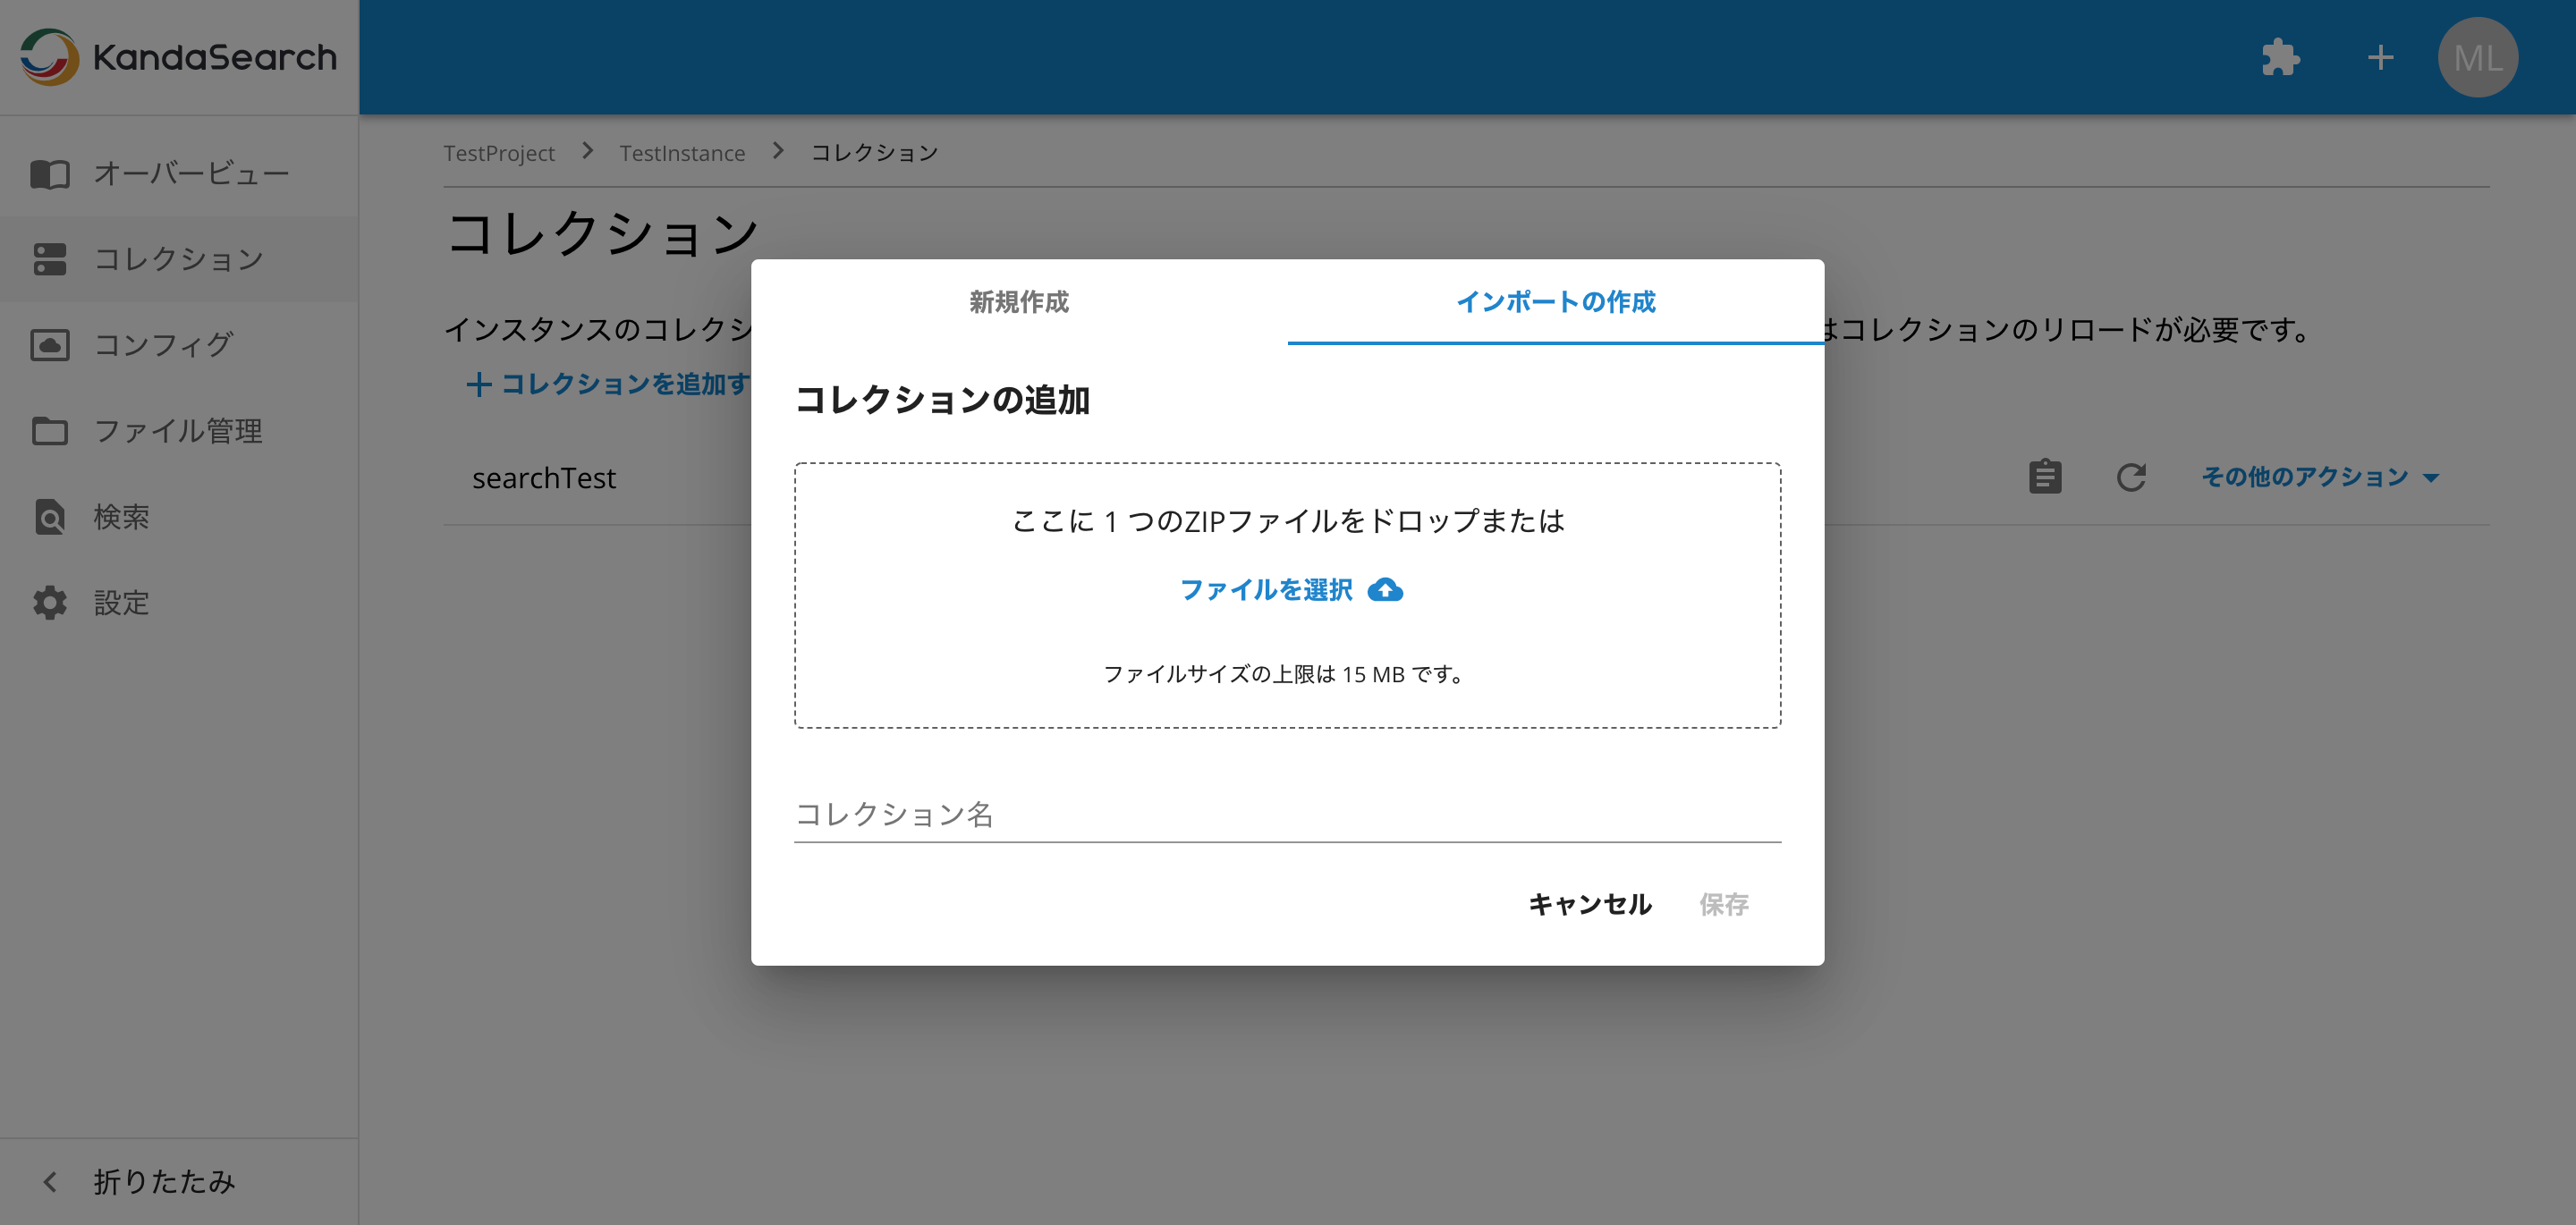
If you need more information about configuring your schema, please take a look at the solr schema configuration documentation here.
Step 5: Index Documents & Search!
At this point we’ve completely configured our instance, so the last thing to do is to index some documents to get your search up and running!
TIP: If you don’t have any documents to index, we provide an extension containing the official Solr Apache sample data. Add it to your project, then download it from your project’s extension page. If you use the sample data provided, make sure to create a collection using the “New” Tab in the previous step.
From your Project Overview Page, click the instance you want to index documents to. You’ll be directed to the Instance Overview Page. Click the “Register Documents” button near the top of the page, and then click “Upload a file” from the dropdown list. Make sure you have selected the correct collection in the collection dropdown list, drag and drop your documents file into the dialog box, and then click the “Index Documents” button.
With that the system will ingest your documents and your search is ready to go! Let’s try out our first search together! Check out the “Search” tab on the Instance Sidebar to navigate to the search page. If you indexed the sample data from the previous step then you can follow these next steps, otherwise you’ll need to enter parameters that fits with your search configuration. Enter the following data in the following fields (without the quotation marks):
- Collection: [select the collection you created from the dropdown box]
- Unique Key field: id
- Title field: name
- Body: features
You can leave the actual search box blank, this is the same as the : in Solr which will return all of your indexed documents. Just click search and watch your search results appear!
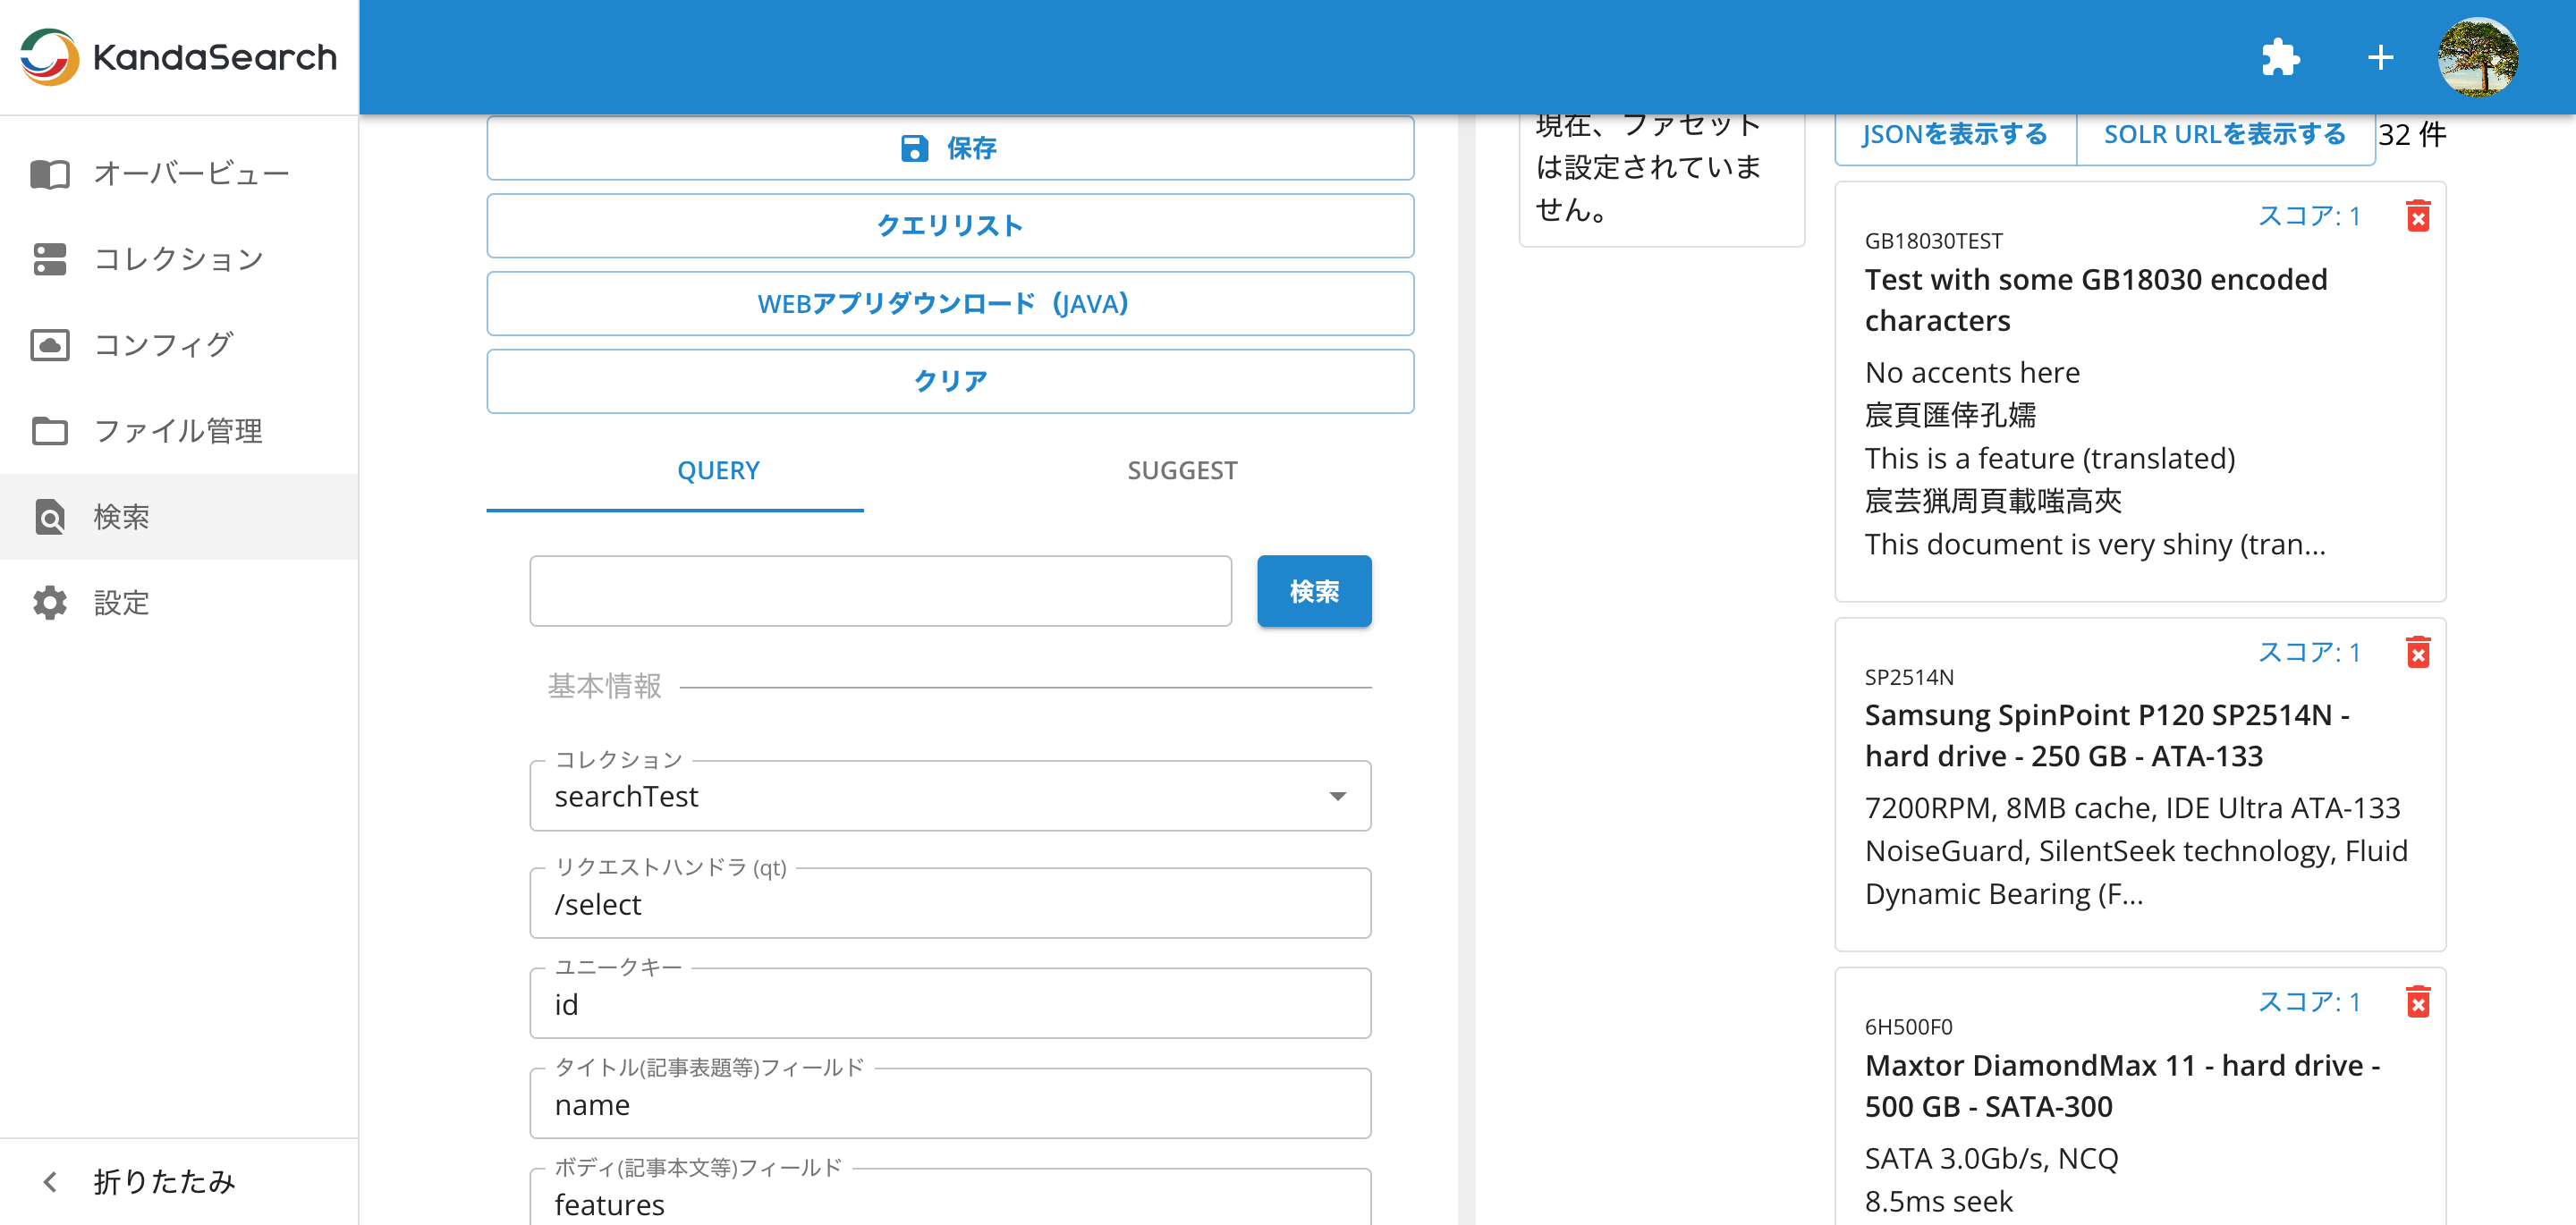
And there you have it! A new search engine in a few simple steps! From here there is a lot more you can dive into to improve, customize, and add features to your search, but this should help you get off the ground!
With the simplicity and ease of use of KandaSearch, we’ve set up your first powerful search engine. Happy Searching!
BONUS: Add Project Members
No man is an island, and your project doesn’t have to be either! KandaSearch was made with the idea that creating the perfect search engine is a collaborative experience, and for this reason you have the ability to add members to your project to help build and manage your search!
Adding members is super simple. From the Project Overview Page, just click the “Members” tab on the Project Sidebar. Once on the member’s page, you’ll be able to see all of the current members of your project as well as their role. To add a new member, click the dropdown labeled “Invite a user to this project”, and then enter the email address for the person you want to invite, select their role, and click “Send Invite”
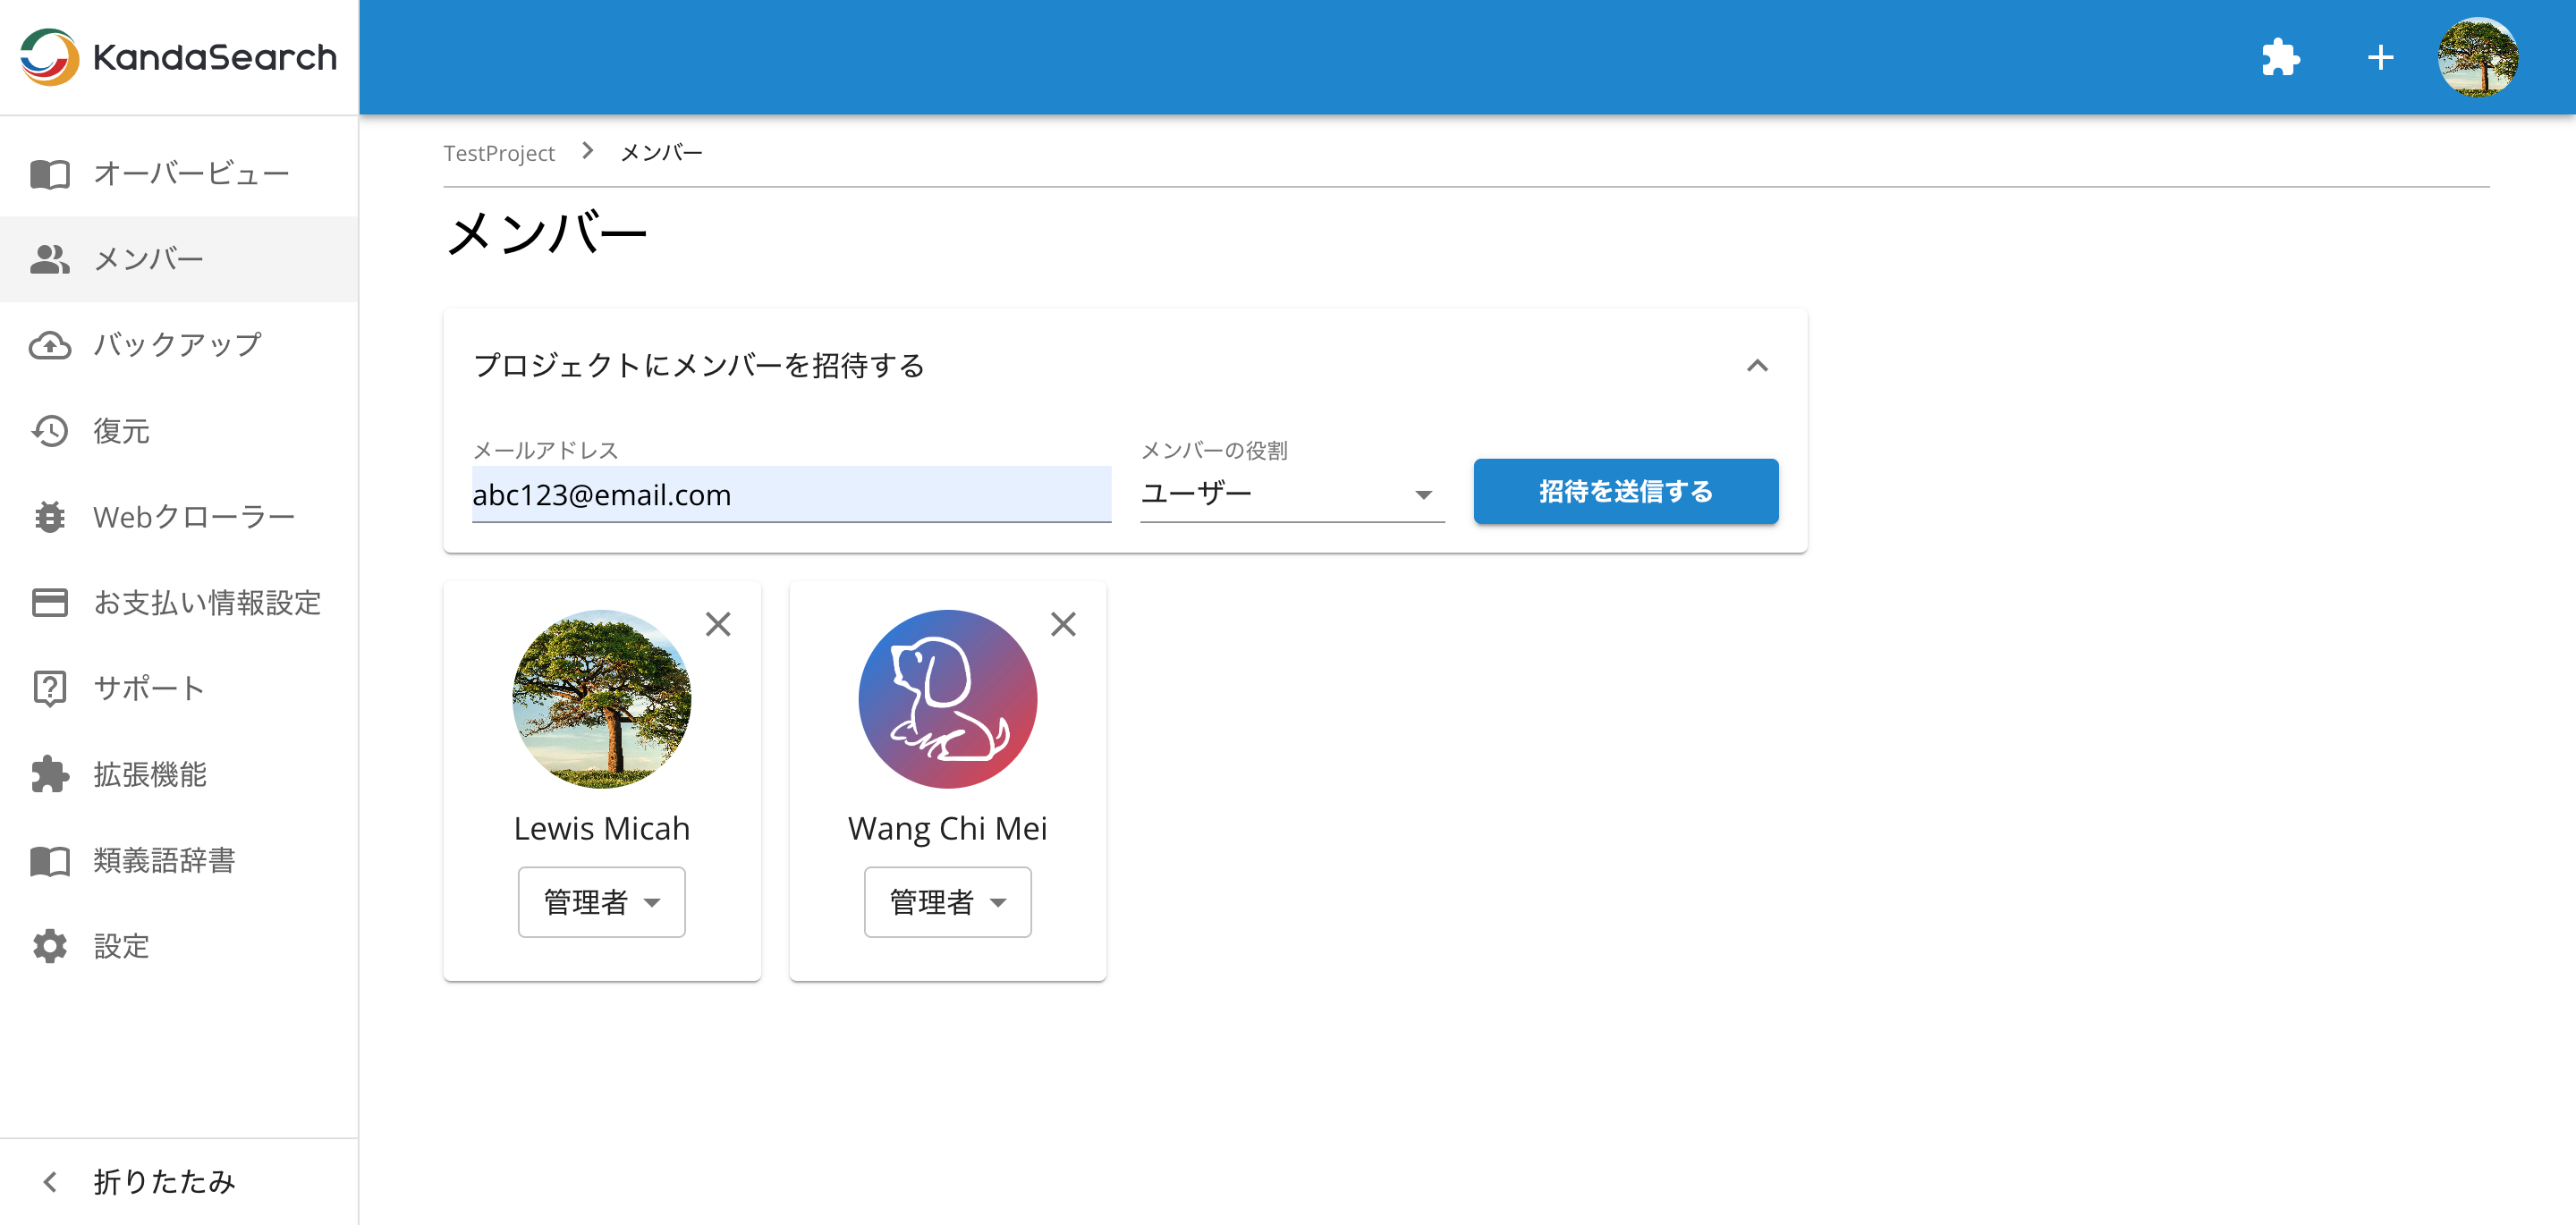
Once they accept the invitation from their email address they will be added to the project!


